Pizza Gaina

IMG_2322OK, confession: this is not a Cooking With Josh recipe. I made this one late last night, long after Josh went to bed, so that it would be ready for Easter morning. This one I would call Cooking With Nonna.

When I was a kid, my grandmother baked what we always called pizza gaina, which apparently doesn’t really exist. It’s actually a dialect or two removed from the Neapolitan pizza chiena, which is dialect for pizza ripiena, or stuffed pizza…

Which is really supposed to be called pizza rustica.

But all of that is academic. In my heart–and in my stomach–I know that this dish is really pizza gaina.

I’m not positive, but  I think I might be the only one of the grandkids who has made this. And as far as I know, no one (including my mother) has anything resembling a recipe. I scoured the web and found this one, adapted from Carlo’s Bakery in New Jersey. I subtracted out the things that I didn’t remember my nonna using and adjusted other ingredients accordingly. What cooked up was a pretty good imitation of the pizza gaina that lives in my memory.

The Dough

6-7 cups flour
1 lb butter
1/4 teaspoon salt
1/4-1/2 cup cold water
5 eggs

The Filling

1 lb cooked ham, cut in bite-size chunks
1/2 lb hard salami, cut in bite-size chunks
1/2 lb soppressata, cut in bite-size chunks
1/2 lb provolone, cut in bite-size chunks
1/2 lb mozzarella, cut in bite-size chunks
4 ounces grated pecorino romano cheese
2 lbs ricotta cheese
10 eggs, plus one additional egg for glazing
1/2 teaspoon black pepper

Combine the flour and salt. Cut the butter into small chunks and mix it in with the flour and salt until the mixture is the texture of sand. Beat the eggs and add it to the mixture. Knead the dough. Slowly add additional cold water, as needed, until your dough holds together. Knead for several minutes, then wrap in plastic wrap and store in the refrigerator for at least a half hour.

Preheat the oven to 350 degrees.

In a large bowl, beat 10 eggs. Add the ricotta, grated cheese, and pepper, and combine. Stir in the remainder of the ingredients.

Cut the dough into two portions, approximately 2/3 and 1/3. Take the larger piece and roll it out to about a 1/4 inch, until it is big enough to cover the bottom and sides of a 15″x 11″ glass dish. Line the dish, making sure to work the dough into the corners. Add in the egg, cheese, and meat mixture. Roll out the remainder of the dough and cover the top, making sure to seal the edges.

Bake for about 45 minutes, then glaze the top with an egg wash. Return to the oven and bake for about another half hour to 45 minutes. You can cover the top with foil if it starts to look too brown.


Posted in Uncategorized | Tagged , , , | 1 Comment

Josh and His Dad Experiment: Skyrim Stew

IMG_1975OK, we’ve been having lots of snow days around here, which means way more video game playing than usual for a school week. The kids even have me playing (OK, it’s not that hard to convince me to join in, I admit). Lately, we’ve all been playing through Skyrim, which inspired Josh to propose another cooking experiment:

Apple Cabbage Stew.

If you have played Skyrim, you will know this dish. If you haven’t ever played, here’s all you really need to know. In Skyrim, you can harvest, gather, or steal various foods and cooking ingredients. Eating food restores your health. But you can also combine ingredients in cooking pots to make dishes with even more restorative properties. Apple Cabbage Stew is one such concoction.

The in-game recipe is very simple: a head of cabbage, a red apple, and a “salt pile.” A little boring, to say the least.

Josh and I decided to dress it up a little bit. We debated whether or not to limit ourselves to in-game ingredients, or to add only non-game ingredients (on the logic that it doesn’t really change the in-game recipe if we added out-of-game ingredients). In the end, the only in-game additional ingredients we used were garlic and wine. Apparently there are no onions in the land of Skyrim–just a lot of leeks.

2 strips bacon, diced
1 small onion, diced
2 cloves garlic, minced
1 small head of cabbage, chopped
1 cup white wine
3-4 red apples, peeled and chopped
1 tsp salt
1/4 tsp nutmeg
1/2 teaspoon Hungarian paprika
2 cinnamon sticks
2 bay leaves

IMG_1979Place diced bacon in a steel pot over a medium flame. Once the fat starts to render, add the onion and salt and cook until it begins to brown. Add the garlic and cook for a couple of minutes.

Add the cabbage and  cook for about 3-4 minutes, until it starts to wilt. Add the wine and deglaze.

Raise the heat to high and cook for about two minutes at a low boil.

Lower to a simmer and add the apples, nutmeg, paprika, bay leaves and cinnamon. Cover tightly and cook for about an hour, or until most (but not all) of the liquid has reduced.

The end result: Josh and I agreed that it was a meal fit for Jarl Balgruuf!

Posted in Uncategorized | Tagged , , , , | Leave a comment

Whoa. Has It Been That Long?

It’s been a long time since I’ve shared any of my cooking adventures with Josh–not quite a whole year, but long enough!

I promise I will get back to sharing food and family with y’all, but for now, I wanted to point you to another project I’ve started up this year: 365 Simplify.

I recently posted a pantry-oriented entry, which seemed a good one to share with readers here.

Enjoy!


Posted in Uncategorized | Tagged , , | Leave a comment

Clear-the-Fridge Quesadillas

quesadillasWe’ve just come back from a family trip out to Colorado–if my math is right, it was the fifth time we’ve gone.We stay in Manitou, a small, artsy, and self-admittedly weird community just north of Colorado Springs.

Every time we go, we rent a suite at one of the roadside motels–since it’s off season, we end up getting two bedrooms, a kitchen, and a living room for less than the price of most national chain hotels. Not only do we save a little money, but it gives us the option of a home-cooked meal whenever we want to take a break from eating out.

At some point toward the end of the week, things start to get a little creative as we try to work out what can we make with what we have in the fridge and cupboards without heading back out to the grocery store. Of course, it helps if when you go shopping you are purchasing food items that are versatile to begin with. We always have corn and flour tortillas around the house for just that reason, and that is certainly the case when we are traveling as well.

What we whipped up below was our last lunch and took care of most of the leftovers in the fridge. The measurements are estimates at best–the most truthful measure would be: whatever you have left.

5 strips of bacon, diced
2 thick slices of deli ham, diced
3/4 cup cooked broccoli florets, chopped
salt, to taste
1-1/4 cup shredded cheddar cheese
10 flour tortillas (taco-sized)

Place the diced bacon in a hot pan and fry until almost crisp. Remove just about all the rendered fat, and then add the ham. Cook for another couple of minutes, until the ham starts to brown in places. Now add the broccoli and cook for another minute or two. Add a few pinches of salt, as needed (depending on how salty the ham and bacon are to begin with). Transfer the saute mixture to a separate bowl and set aside.

quesadilla sauteNow, you could use a new frying pan for this next step, but I usually just give the pan a quick wipe with a paper towel….

Place a flour tortilla in the hot pan. Add a handful of cheese and two tablespoons of the saute mixture. Place a second tortilla on top and press lightly–enough to flatten the  mixture without obliterating the broccoli. Cook until the bottom tortilla starts to brown, making sure not to burn it. Turn and cook until it begins to brown on the other side.

Set aside the cooked quesadillas for a couple of minutes, then slice into quarter. Serve with, well, whatever else you have in the fridge that you are trying to use up!

Posted in Uncategorized | Tagged , , , , , | Leave a comment

Rapini

rapiniMaybe it’s the Italian genes that my kids carry, but everyone in the house loves rapini.

Rapini, or broccoli rabe, are a great late winter/early spring green–that is, if you can appreciate that “good bitter” taste that I associate with this dish. The other day at the farmer’s market, I saw some good looking bunches and decided to bring some home for dinner. Now I am sure there are plenty of ways to prepare broccoli rabe, and I am sure they are all equally yummy, but for me, rapini are best when served up with garlic and olive oil and tossed in a pasta–and more precisely, gemelli.

I can’t always count on Josh’s help in the kitchen on a school night, but it is not at all uncommon for me to grab the phone and give my mother a quick call to double-check her take on a recipe. And to be honest, that’s where all this generational cooking got started in the first place–with me, asking her how to make some dish, and then modifying it a bit to make it my own. And with any luck, I will be getting calls like that from my kids in a couple of decades as well.

The really great trick I learned from my mom on this dish is to put the rapini stems in the pasta water. It lends a great deal of flavor to the pasta (and if you want to eat the stems, a 7-9 min boil will do the trick.)

1 bunch of rapini or broccoli rabe (about a pound)
1/2 lb gemelli pasta
2-3 tablespoons olive oil
2 cloves garlic, minced
1 teaspoon salt, plus salt for your pasta water

Wash the rapini and trim off the very base of the stem. Chop the greens roughly, into bite-size pieces, down to the stems. Break off any remaining broccolini that are still attached to the stems and place them with the chopped greens.

Place a pot of salted water on the stove (enough water to cook a 1/2 lb of pasta) and add the rapini stems. Set the heat on high and bring to a boil.

Just as your water is getting ready to boil, heat about 2 tablespoons of olive oil in a 12-inch stainless steel frying pan. Add the minced garlic and simmer for a minute or two. Then add the rapini (which should still be a little wet from washing) and 1 teaspoon of salt. Cook over a medium flame.

Add the gemelli to the boiling water–the time it takes to cook the pasta should be time enough to cook the rapini as well without overcooking it. Watch the moisture in the frying pan, and as it starts to look too dry, add a few tablespoons of the pasta water.

When the pasta is al dente, remove the boiled rapini stems and set aside (eating is optional). Drain the pasta. Next, add the drained pasta to the rapini and cook for another 30 seconds or so, stirring through. Shut off the heat and drizzle an additional tablespoon (or so) of olive oil over the top of the dish. Toss and serve.

Serve as you see fit: as is, or with grated cheese, additional olive oil, red pepper flakes, or even a squeeze of lemon.

Posted in Uncategorized | Tagged , , , , , | 2 Comments

The Last Vidalia

IMG_0990Did you miss them?

For a brief period–just a few weeks–they show up in our Georgia grocery stores and farmers’ markets. Then they are gone. And more often than not, you have to get there just as the green grocer is unpacking them or you are out of luck, because chances are, they will be sold out immediately.

OK, maybe not everyone is that passionate about onions, but baby Vidalias are a true seasonal treat. If you manage to find some still, grab ’em all and figure out what to do with them later. For me, there’s really only one way to prepare them–drizzled in olive oil and roasted in the oven. The more traditional way to prepare spring onions of any variety–called cebollitas in Mexico–is to grill them, but the broiler works just fine.

One bunch of baby Vidalia onions
Olive oil
Salt

I know: not much of a recipe, right?

Wash the baby onions, removing the outer layer if necessary. Cut off all but about three or four inches of the green stems. Split any large onions, especially if the onion already has two bulbs. Rub each in olive oil and lay in a single layer in a glass dish. Salt aggressively.

Place under the broiler, set on high, on the second rack. Broil for about five to ten minutes, watching to make sure the onions don’t burn. You want the green stems to start to crisp and for the entire onion to start to brown. Watch also for spattering oil–it can get smoky, and you definitely want to avoid flare-ups.

Turn the onions and cook for another five minutes under a high broiler. Lower the broiler to low and cook for about another five minutes.

Cebollitas are a great side dish to go with grilled steak. They also make a great little appetizer. The only problem with them is–you only have a couple of weeks to enjoy them.

In fact, the sad, solo cebollita pictured above is the last known baby Vidalia onion within a 25-mile radius of Atlanta, last seen on the end of my fork.

Posted in Uncategorized | Tagged , , , , , , | Leave a comment

Lasagna Bolognese…Sort Of

lasagnaHow did lasagna get to be a special occasion food? Think about it: it’s basically just a casserole, right? An incredibly delicious, and wonderfully satisfying casserole that, in my humble opinion, should be in everyone’s heavy rotation.

As with most Italian dishes that I cook, this is my mom’s lasagna, with little tweaks. I haven’t really messed with it much at all, really–except I prefer using “no boil” pasta. Truth in advertising, though: this is not truly lasagna Bolognese–the meat sauce is not really a Bolognese sauce, and there’s not a hint of bechamel sauce to be found in it either. But you know what? The kids love it, it’s easy to fix…and the leftovers are yummy too!

1 lb ground chuck
1 lb mild Italian sausage, casings removed
2 eggs, hard boiled
1 egg, raw
1 teaspoons salt
2 lbs whole milk ricotta cheese
1 lb whole milk, low moisture mozzarella cheese
1 box (9 oz) “no boil” lasagna pasta
~24 oz. homemade red sauce
Freshly grated Parmesan cheese, to garnish

Get your sauce going–sorry, no recipe for this part. Make it simple, though–garlic, salt, basil. While your sauce is cooking, season and brown the ground beef and sausage meat in a frying pan. Go ahead and prep the rest of your dish at this point as well: grate the mozzarella; add the raw egg and the salt to the ricotta cheese and combine; peel and crush the hard boiled eggs.

Once the meat is browned, drain (most of) the oil and add around two cups of the red sauce. You want the meat moistened through, but not soupy. Keep at a simmer for another 5-10 minutes until thickened. Remove from the heat.

You are now ready to assemble. Lightly coat the bottom of a 9″x13″ glass casserole with several tablespoons of red sauce. Lay down a single layer of lasagna noodles. Next layer the meat sauce–use about half. Next add a layer of the crumbled hard boiled egg. Next, spoon in about half of  the ricotta. Finally, layer half of the mozzarella. Add a few dabs of red sauce, and then lay down a second layer of lasagna noodles. Repeat all of the above: meat sauce, egg, ricotta, mozzarella, and dabs of red sauce. Place a final layer of lasagna pasta over the top and cover with a layer of red sauce–at least 4 oz, but no more than a cup.

Cover the lasagna with aluminum foil and bake in a 350 degree oven for about a half hour (everything should be bubbling along nicely by that point). Remove the foil and bake for another five minutes, making sure the top does not start to crisp or brown.

Remove from the oven and let the lasagna rest for another five or ten minutes. Just before serving, grate Parmesan cheese over the top.

That should do it. Oh, and in case you’re wondering: why the hard boiled egg? I am not sure where my mother picked this up, but that is her trick to keep the lasagna from getting too runny. The egg disappears as both taste and texture in the dish, but it does help to bind everything together by absorbing flavors from both the meat sauce and the cheese.

And for the record: hands down, lasagna is Josh’s all time favorite leftover!

Posted in Uncategorized | Tagged , , , , | 2 Comments

Clam Dip

Clam Dip!Clam dip is one of those foodstuffs that seems to polarize people–either you are completely grossed out by the look, taste, and smell of the stuff, or you are looking to scarf the whole bowl by yourself. I have managed to make converts out of my entire family, and it has now become an expected addition to any party or holiday celebration. We certainly had a batch ready for New Year’s Eve, and it was long gone before midnight!

So here’s my theory: clam dip is gonna make a comeback this year, I can feel it. Retro food is still big, and what’s more retro than clam dip, right? So mark my words. 2013 will be the start of a clam dip renaissance!

1 box of cream cheese (8 oz)
1 box of (American) Neufchatel cheese (8 oz)
2 cans minced clams (13 oz total)
2 oz whole milk

Soften the cheese (I use a microwave, set on low). NOTE: When I first started making this dip, I used 16 oz cream cheese; if you use equal parts cream cheese and Neufchatel, you will get a less fattening–but less creamy–dip. You could use Neufchatel alone, but I don’t recommend it.

Whip the cheese until it is smooth. Add the milk a little at a time, continuing to whip the cheese. You should have a soft whipped cheese at this point, but something thicker in consistency than a dip.

Open and drain both cans of minced clam–reserving the liquidAdd the clams to the whipped cheese and combine. Now add 3-4 oz of the clam liquid, a little at a time. When you are finished, your dip may seem a little runny, but don’t worry. You will want to chill the dip for at least a half hour before serving, at which point it will thicken up considerably.

And what should you dip into your dip? Not your fingers, though some of my kids have been caught in the act. We pretty much insist on corn chips–not tortilla chips, but the other kind, and preferably the “scooping” variety.

Posted in Uncategorized | Tagged , , , , , | Leave a comment

Braciole

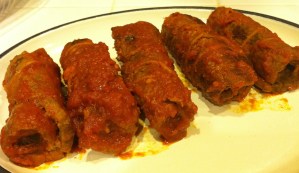
una braciola, due bracioleThere’s something special about a braciola. Maybe it’s because they tended to show up in the Sunday sauce closer to the holidays, but braciole more than any other meat dish remind me of being very young and hanging out with my cousins at my grandmother’s house. Nothing like a little nostalgia to get me hungry and inspired to cook!

For the uninitiated: a braciola is a beef cutlet pounded thin, then seasoned and rolled. I usually will use a round roast for this dish, sliced thin by the butcher, but according to my mother, the best cut to get for braciole is “whatever is on sale and looks good.” Needless to say: since this dish is yet-another example of poverty cooking at its finest, tenderness will have less to do with the cut of meat than with the length of time spent braising it.

What you season your braciole with is a matter of taste…or tradition. Me, I keep it simple. And as with anything involving fun food prep, it’s a great dish to prepare with little hands in the kitchen.

1-3/4 lb round roast, cut into 1/4″ cutlets
4 cloves garlic, minced
3/4 cup chopped parsley
1/3 cup grated Pecorino or Parmesan cheese
salt
black pepper
olive oil
toothpicks or butcher’s twine
tomato sauce or other braising liquid

pre-roll prepPound the cutlets until thin, but not tearing through. Spread out as many as will fit on a cookie sheet and season with salt, pepper, parsley, and freshly grated cheese. Scatter evenly across the meat a pinch or two of minced garlic  (more or less, to taste). Drizzle lightly with olive oil.

Now comes the rolling. Start with the thinnest end and roll–firmly, but not too tightly. The goal here is for the braciola to hold together, but you don’t want the meat too dense. Now there are two schools as to what you do next: toothpicks or twine. Either toothpick the braciole shut to keep from opening (one or two should be sufficient), or bind them in a couple of wraps of butcher’s twine. I go with the twine because, well, that’s the way my mother did it. Only, she never had butcher’s twine and used cotton sewing thread instead.

browning bracioleNext, you will want to brown the braciole in relatively small batches. I use olive oil for this step. Brown on all sides and set aside.

The final step is a long braise, and this is where the Sunday sauce comes in. I am not going to get into sauce recipes–or what we called “gravy” in my house (and many other Italian-American households in the northeast), but the best braise for braciole, in my opinion, is simply to add them to a basic tomato sauce and allow them a long, slow cook: say, an hour and a half. When tender to a fork, remove from the gravy–I mean sauce–and transfer to a serving dish to accompany your pasta–preferably rigatoni.

You can unbind all the braciole yourself, but I would leave that to each family member. And if you are using toothpicks: make sure everyone knows how many they should find!

tanti braciole

Posted in Uncategorized | Tagged , , , | 2 Comments

Black Bean Soup

Black Bean SoupOK, so we’re done with all of the turkey leftovers, right? Normally, Thanksgiving ends with a boiled-down turkey carcass, a dish my cousin affectionately nicknamed “residue soup,” but this year, we did rolled, stuffed turkey breasts, so no bird bones to use up.  Still, it seemed like a good week for soup of some flavor.

We do lots and lots and lots and lots of soups in this household, especially once the weather turns cold. Not only are they hearty and healthy, but they are a very affordable meal offering as well–so consider this recipe my very own “fiscal cliff” preparedness plan!

1 lb dried black beans
3 strips of bacon (optional)
8 cups water
1 green bell pepper, chopped
1 medium sized yellow onion, chopped
3-4 cloves garlic
1 teaspoon olive oil
1-1/2 teaspoons salt
1 teaspoon oregano
olive oil & crema or sour cream to garnish

I’ve got this thing with dried beans. I just about never pre-soak them. It increases my cooking time, but more often than not, I will start a dish like this in the morning, using a slow cooker, then I transfer the beans to a pot on the stove top when I get home at night to finish cooking. You do whatever you like, though, and adjust your cooking times accordingly.

Rinse the beans (removing rocks, etc.) and transfer to your cooking device of choice. Add in 8 cups of water and begin cooking.

Dice the bacon into small pieces and fry until crispy. Drain (most of) the fat and add the bacon to your bean pot. The bacon is optional–if you need a vegetarian version leave it out, though personally I have a hard time imagining this dish–or life, for that matter– without bacon.

When your beans are soft (8 hrs in a slow cooker; 2-1/2 hrs in a pot), heat 1 teaspoon of olive oil in a soup pot. Puree the green pepper, onion, and garlic in a blender or food processor, adding a small amount of the bean water if necessary. Add this puree to the soup pot and cook for two or three minutes. You can certainly saute the pepper, onion, and garlic as a fine mince, but as I have noted before, my kids prefer their pepper and onion hidden!

Now carefully transfer the cooked beans and cooking water into the soup pot. Add the salt and oregano, cover, and simmer over a low flame for another half hour.

Serve with a drizzle of olive oil and a dollop of crema.

Posted in Uncategorized | Tagged , , , , | Leave a comment